Guest post by Semilac.ie
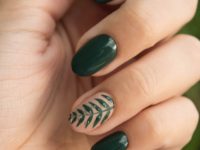
Ombre nails have been conquering the beauty industry over the past few years. It is a beautiful nail design where colors fade into each other, creating a sunset or ocean effect on each of your fingers.
Although ombre nails are not the simplest manicure to do at home, if you are patient and careful, you can make your DIY ombre manicure stunning.
Let’s go through the most important tips and a little step-by-step guide to help you achieve the perfect ombre effect on your nails.
What equipment do you need to do DIY ombre nails?
First of all, you need to equip yourself with all the essential tools before you get to work. It will prevent you from touching anything unnecessarily during the manicure process and, possibly, damage your fresh manicure.
That being said, you need to prepare:
- Protein base coat,
- Nail gel polish shades,
- Top coat,
- Sponge makeup wedges,
- Tape,
- Nail polish remover.
Protein-base coat
It facilitates the smooth spread of the gel nail polish and protects your natural nails from discoloration or flaking. Keep in mind to buy a base infused with antioxidants, as they protect nails from pollutants from the environment.
Nail gel polish shades
Nail gel polish shades you want to apply. Choosing is not an easy task, so it is recommended to look into some inspirations for ombre nails before you start your home manicure. Although you can blend all the colors you want, you may sometimes feel insecure about your choice. Luckily, there are numerous ideas on social media and beauty blogs.
Top coat
It adds texture and a matte or glossy finish to your manicure. Moreover, it protects your ombre manicure from premature chipping.
Others
Sponge makeup wedges allow you to achieve the ombre effect on your manicure in the easiest way. Tape is needed to clean off debris from your makeup sponge. Finally, it is also worthwhile to have a nail polish remover at hand. It helps you remove all the spills or colors outside the nail lines.
Ombre nails at home: a step-by-step guide
Once you are equipped with all the necessary products, you can start with your ombre manicure.
Step 1: Protein base coat application
Before you apply any gel nail shade to your nails, you need to apply a protein base coat. The best practice is to apply two layers and let them completely dry before you proceed.
Step 2: Cleaning sponge makeup wedges
With the protein base coat applied, you can now grab a little piece of tape and dab it delicately over sponge makeup wedges. This way, you will make sure that the wedges are perfectly clean and won’t leave any pieces during the shade application.
Step 3: Applying nail polish shades to the sponge
With the wedges prepared, you should now put each shade on the sponge in rows. It is advisable to make colors slightly overlap and make sure that there is no space between each of them. Otherwise, you won’t achieve the smooth ombre effect on your nails.
Step 4: Doing the ombre on your nails
With the shades applied, you can start to apply them to your nails. Therefore, you need to carefully dab each sponge into each of your nails, let it fully dry, and repeat to end up with two layers of nail polish.
Step 5: Cleaning the sides of your nails
With the nail polish applied, you should soak cotton pads in nail polish remover and carefully clean the sides of your fingernails.
Step 6: Applying the top coat
Finally, the last step is to apply a top coat that will protect your manicure from premature damage and give off a smooth ombre nail effect.
As you can see, ombre nails at home are not as difficult as they may seem. If you follow all the tips and steps above, you will surely achieve the perfect ombre manicure, just like a professional nail technician.


